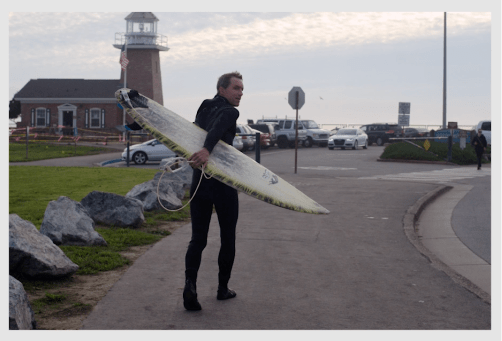
If your subject is against the bright sky, the challenge is to make adjustments separately. There is a little trick that will help you balance the exposure.
When I took the picture, I exposed for the highlights, so that the sky wouldn’t blowout, keeping the details. By doing this, my subject will be underexposed inevitably. The good news is you can always recover the shadow details if you shoot in RAW format.
Step 1 – Set white balance
Place the eyedropper on the part that is naturally white, in this case, we will use the surfboard as the white reference.

Step 2 – Decrease highlights
By doing this, we are recovering the details of the sky. You can see the difference in the clouds.
Step 3 – HDR-scape
HDR-scape is a feature that further enhances the details in the shadows. It might look too strong initially. We will need to tune down the filter strength and add brightness.

Step 4 – Portrait
Now the overall exposure is right, we can focus on the subject. With the face spotlight feature, you can brighten up the subject’s face just like the radial filter in Lightroom or vignette effect. The key is to soften the edge of the spotlight. Skin smoothing won’t be necessary here.

Step 5 – Grainy film
Instead of making the sky blue and saturated, I reckon it’s appropriate to stylise it with a neutral tone. I pick the A02 filter in the grainy film that gives a bit urban vibe.

Watch the full video here